ChurchArt Pro Caption Editor Features
ChurchArt Pro gives you more flexibility when customizing artwork in the Caption Editor. With Pro features, you can add more text, adjust layouts, create designs for different formats, save work for later, and export your finished artwork in more ways.
Note: Some tools may look slightly different depending on your screen size or the type of artwork you are editing.
Add and edit more text
With ChurchArt Pro, you can add your own captions and edit existing editable text areas. This gives you more control over announcements, service details, event information, and other custom messaging.
You can adjust text basics such as:
- Font
- Size
- Color
- Bold or italic styling
- Alignment
- Line spacing
- Position and rotation
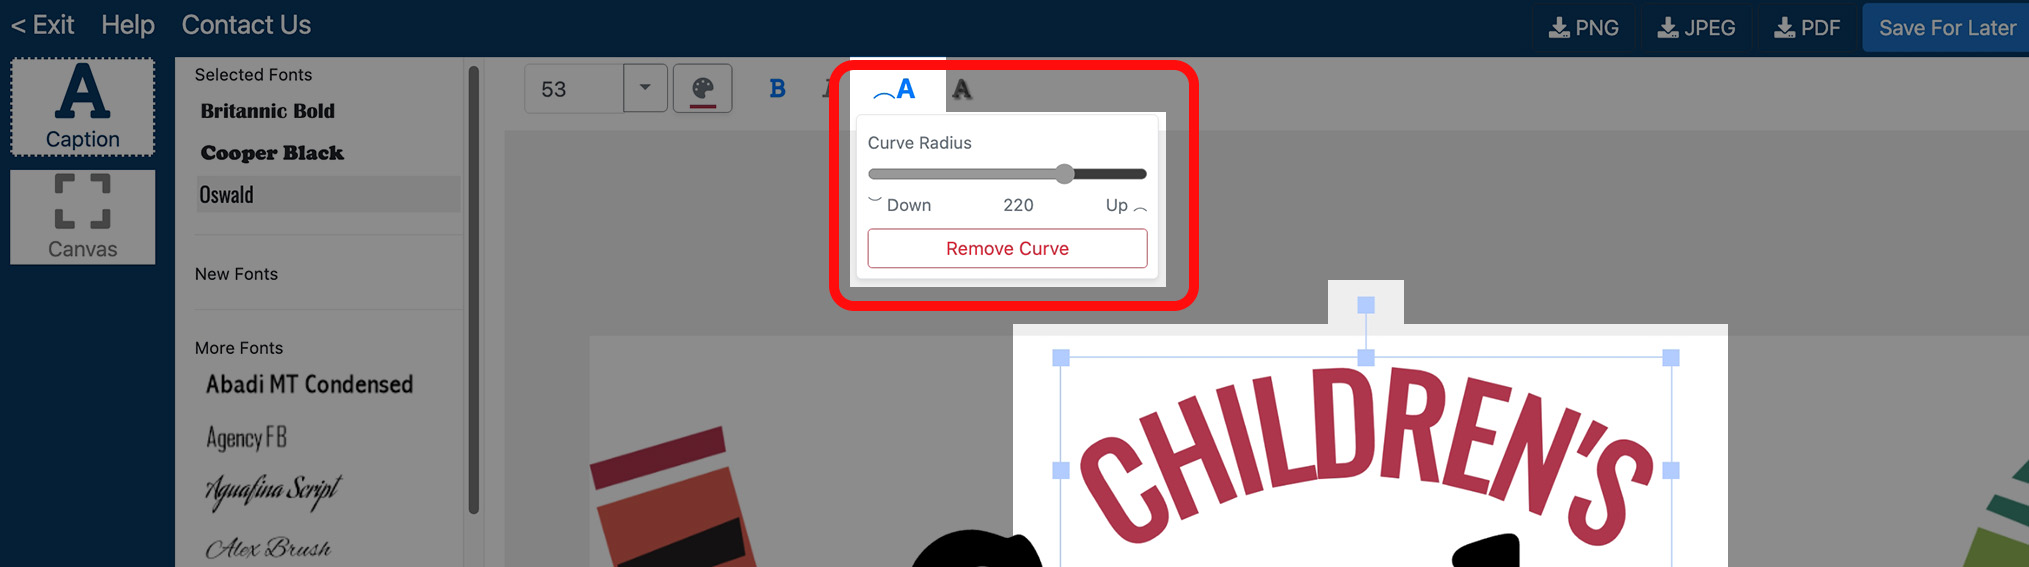
Create curved text
Pro users can curve a line of text upward or downward for a more designed look. This is helpful for badges, seals, circular layouts, headers, or decorative emphasis.
Curved text works best with short, single-line text.
Use more advanced color options
The Pro color tools make it easier to match your text to your artwork or church branding. You can choose colors visually, enter a specific hex color, or use the eyedropper tool to pick a color from the design.
This is especially useful when you want captions to blend naturally with the artwork or match an existing color palette.
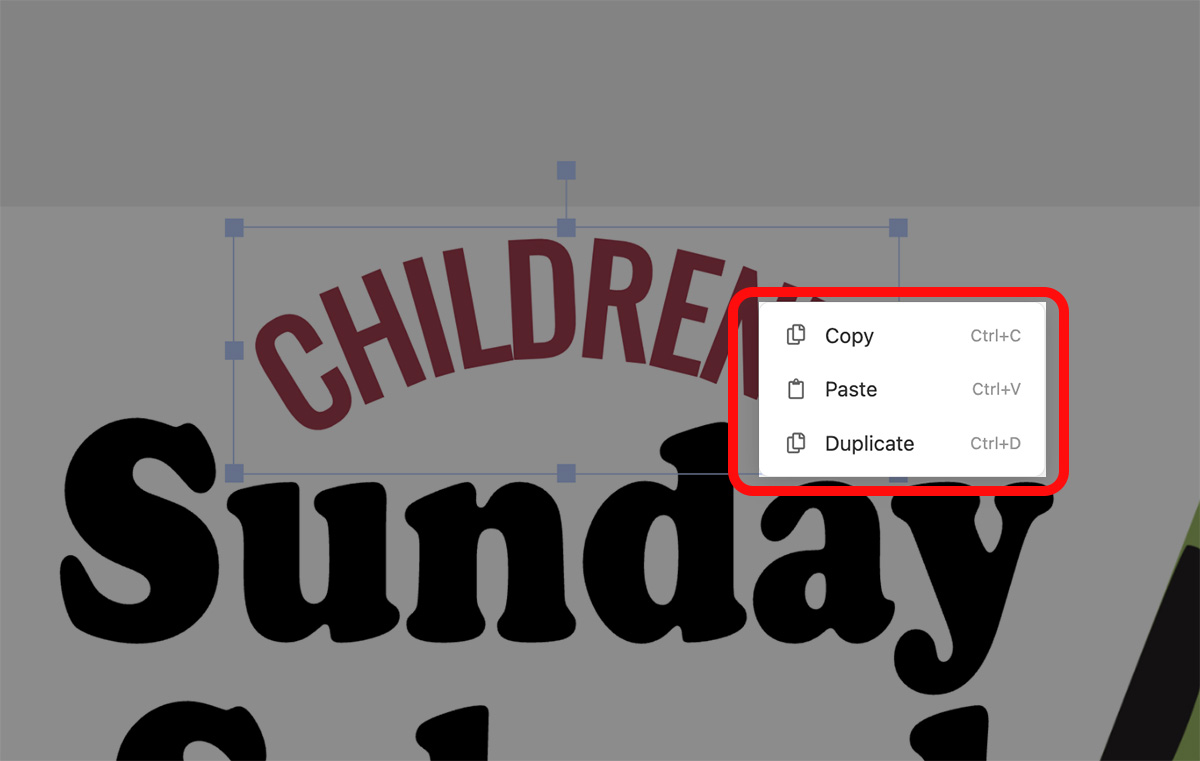
Copy, paste, and duplicate captions
ChurchArt Pro makes it easier to reuse text styling and layout. You can copy, paste, or duplicate captions instead of rebuilding similar text boxes from scratch.
This is helpful when creating multiple event details, repeated service times, or similar callouts across a design.
Resize and reposition text boxes
Pro users can resize, move, rotate, and adjust caption areas directly on the artwork. This gives you more control over the final layout and helps your message fit the design cleanly.
Work with multi-page designs
Some ChurchArt designs include more than one page. When multiple pages are available, you can switch between pages and customize each one.
This is useful for multi-page resources such as bulletins, flyers, handouts, or other printable materials.
Change the canvas size
ChurchArt Pro includes preset canvas sizes so you can adapt artwork for different uses, such as:
- Letter portrait
- Letter landscape
- Bulletin cover
- Social media square
- Social media landscape
- PowerPoint formats
This helps you repurpose the same artwork for print, projection, and social media.
Zoom and pan while editing
When working on detailed areas of a design, you can zoom in for more precise editing. If the zoomed-in artwork no longer fits on screen, panning controls help you move around the design.
Download as an image or PDF
ChurchArt Pro gives you additional download options, including PDF export. This is helpful when preparing artwork for printing, sharing, or distributing to your team.
For multi-page designs, the PDF download includes the available pages.
Save your work for later
With ChurchArt Pro, you can save edited designs and come back to them later. This is useful when you want to start a design, review it with your team, and make final changes before downloading or printing.
The editor may also offer to restore unsaved work if your browser closes or refreshes before you save.
Summary of Pro Caption Editor features
ChurchArt Pro gives you access to advanced editing features, including:
- Adding and editing custom captions
- Curved text
- Advanced color selection and eyedropper
- Copying, pasting, and duplicating captions
- Resizing and repositioning text
- Multi-page editing
- Preset canvas sizes
- Zooming and panning
- PDF download
- Save for Later
- Restore unsaved work when available
These tools help you customize ChurchArt designs for print, screens, social media, and ministry communications.